My Store
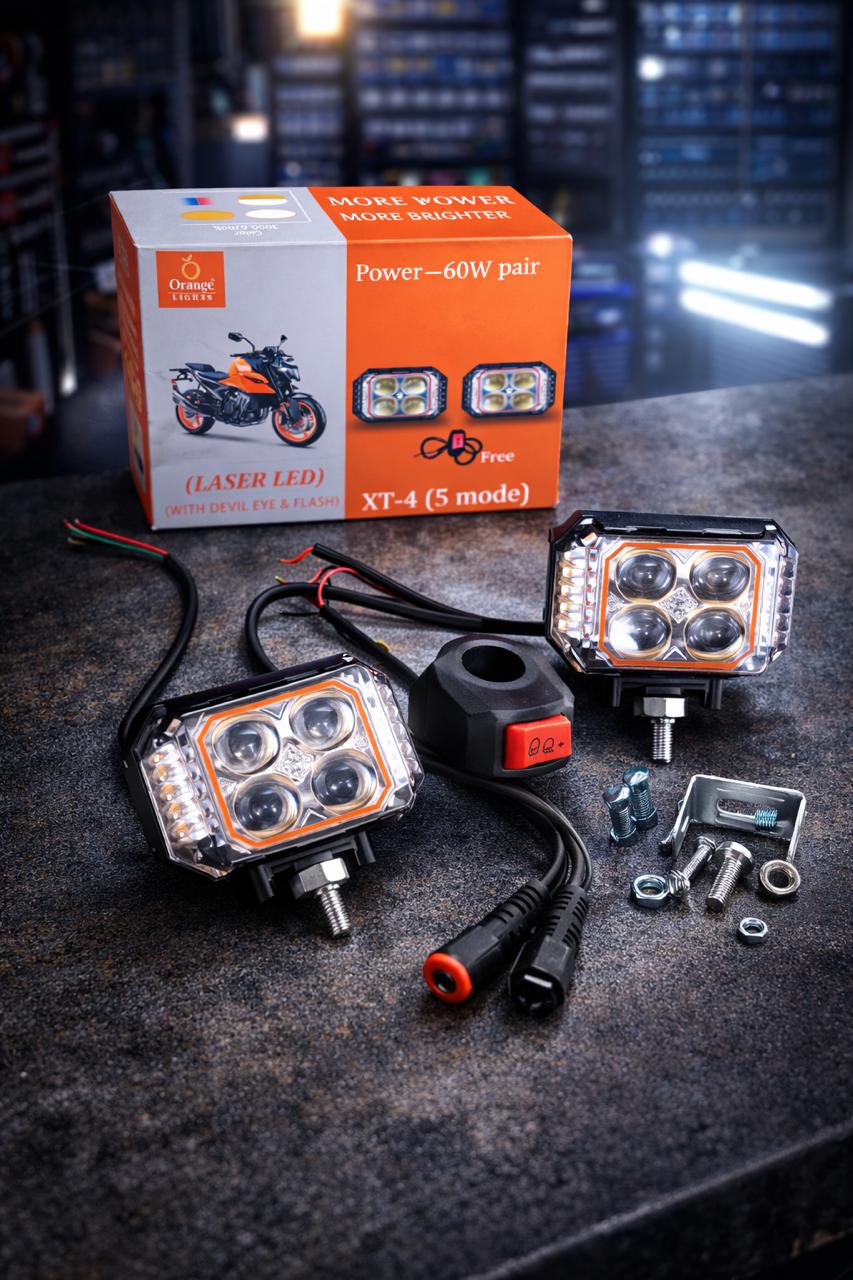
XT-4 Laser LED Motorcycle Fog Light (60W Pair | 5 Modes)
XT-4 Laser LED Motorcycle Fog Light (60W Pair | 5 Modes)
Couldn't load pickup availability
Key Features:
High Power Output: 60W per pair for strong and clear illumination
Laser LED Technology: Long-range focus with wide beam spread
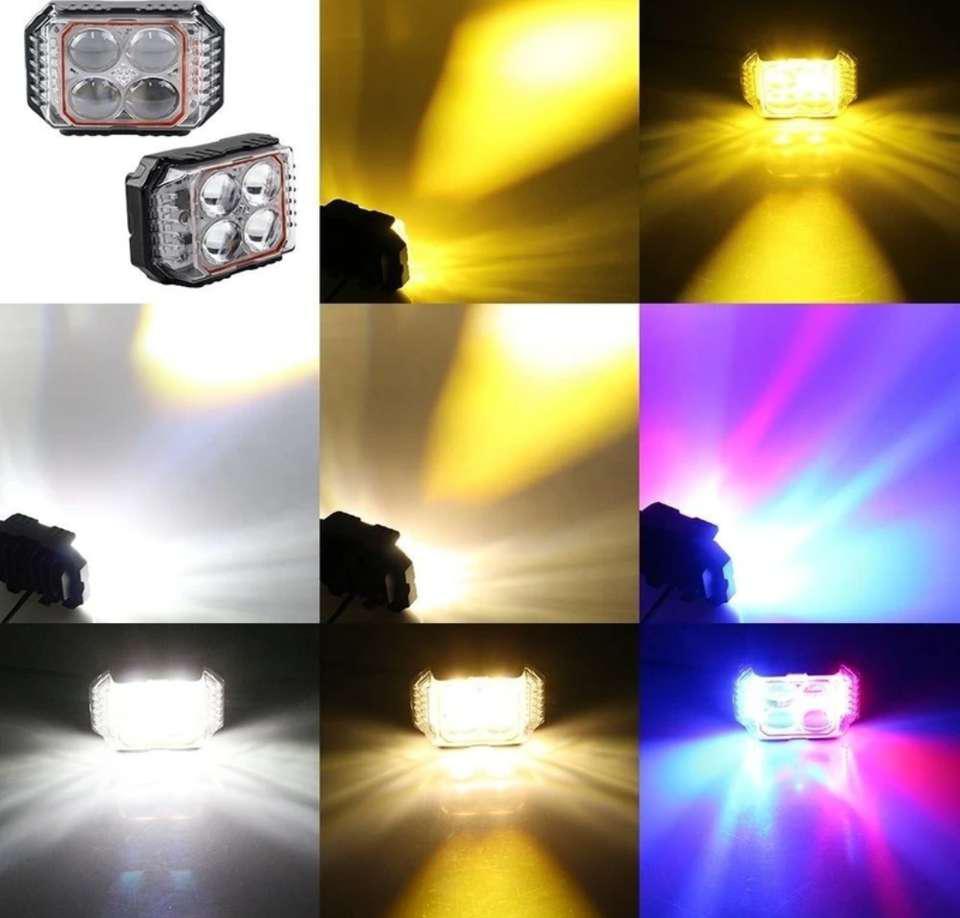
5 Lighting Modes: Normal beam, high beam, devil eye, flash, and combo modes
4-Lens Square Design: Balanced flood & spot lighting for night and fog riding
Devil Eye Effect: Stylish glow for enhanced bike appearance
Flash Mode: Improves visibility and road presence
Waterproof & Dustproof: Suitable for rain, fog, and rough weather
Strong Metal Body: Shock-resistant and heat-dissipating design
Universal Fit: Compatible with most motorcycles and scooters
Easy Installation: Comes with wiring harness & handle switch (Free)
Ideal For:
Night riding, foggy roads, highways, touring, and off-road use.
Package Includes:
2 × XT-4 Laser LED Fog Lights
Wiring harness with switch
Mounting clamps
Box packing
Wiring & installation guide
This is a general safety checklist, not a model-specific wiring diagram. Have a qualified motorcycle electrician install the lights if you are unsure.
Before wiring
- Confirm the lights’ rated voltage, polarity and actual electrical load from their labels or manufacturer instructions. Check your motorcycle’s charging capacity and accessory limits.
- Inspect the supplied harness, switch and connectors. Do not assume a relay or fuse is included. Ask the supplier for the exact wiring diagram and specified fuse, wire and relay ratings before connecting power.
- Use a correctly rated, fused accessory supply approved for your motorcycle. Any battery-positive feed must have suitable fuse protection close to the battery. Never connect an unfused feed or overload the headlight, ignition or other existing wiring.
- Use an approved ground connection and insulated, weather-protected connectors. Do not guess wire functions from colours or bypass a fuse.
Installation sequence
- Switch off the ignition and follow your motorcycle’s service manual for safely isolating the battery before working.
- Mount the lamps securely, clear of hot parts and moving components. Check full steering movement and suspension clearance.
- Route and secure the harness away from the exhaust, sharp edges and pinch points. Leave enough slack for steering without pulling the cables.
- With power isolated, connect the lamps, switch, ground and protected supply according to the verified wiring diagram. Do not splice into vehicle electronics without model-specific guidance.
- Check polarity, insulation and fasteners before restoring power. Test each mode while stationary. Stop immediately if wiring heats up, a fuse blows, lights flicker or there is a burning smell; have the fault checked rather than fitting a larger fuse.
- Aim the lamps downward on level ground, then recheck mounting and cable security after the first ride.
Protect oncoming riders & drivers
Never aim these lights at oncoming traffic or into mirrors. If the beam causes glare, switch the auxiliary lights off until their aim is corrected. Do not use high-intensity or flashing modes around other road users. Auxiliary lights are not a replacement for your required headlight.
Check local regulations before road use, including permitted lamp mounting, beam aim, colours and flashing modes. Available modes and universal-fit wording do not establish road-use approval or compatibility with every motorcycle.
Share